langchain+chatglm2 Linux/wsl2部署
说明:
- 如果个人学习目的,云服务器推荐autodl,不用时可以关机,关机后不计费。
- 用git-lfs从huggingface下载模型文件时,很可能会出现网络连不上的情况,这时候多试几次就行。一旦连上,下载速度很快。
1.ubuntu安装基础gcc
sudo apt install gcc 2.ubuntu安装cuda:
wget https://developer.download.nvidia.com/compute/cuda/repos/ubuntu2204/x86_64/cuda-ubuntu2204.pin
sudo mv cuda-ubuntu2204.pin /etc/apt/preferences.d/cuda-repository-pin-600
wget https://developer.download.nvidia.com/compute/cuda/11.7.1/local_installers/cuda-repo-ubuntu2204-11-7-local_11.7.1-515.65.01-1_amd64.deb
sudo dpkg -i cuda-repo-ubuntu2204-11-7-local_11.7.1-515.65.01-1_amd64.deb
sudo cp /var/cuda-repo-ubuntu2204-11-7-local/cuda-*-keyring.gpg /usr/share/keyrings/
sudo apt-get update
sudo apt-get -y install cuda
cuda下载地址:
ubuntu22.04, cuda11.7.1,文件链接
wget https://developer.download.nvidia.cn/compute/cuda/11.7.1/local_installers/cuda-repo-ubuntu2204-11-7-local_11.7.1-515.65.01-1_amd64.deb
3.安装miniconda
miniconda下载地址,选择linux:
https://docs.conda.io/en/latest/miniconda.html
1. wget https://repo.anaconda.com/miniconda/Miniconda3-latest-Linux-x86_64.sh
2. sh ./Miniconda3-latest-Linux-x86_64.sh

安装提示安装Miniconda
4.安装miniconda
下载langchain-chatglm2-6B
1. git clone https://github.com/imClumsyPanda/langchain-ChatGLM.git
2. cd langchain-ChatGLM
3. conda create -p ./env python=3.10
4. ./env/bin/pip install -r ./requirements.txt
5. ./env/bin/pip uninstall torch  #默认安装的torch是CPU版本,需要换成torch-gpu版本。
6. ./env/bin/pip install torch torchvision torchaudio --index-url https://download.pytorch.org/whl/cu118
5.下载embedding模型文件
需要先安装git-lfs,下载地址和安装教程如下:
https://github.com/git-lfs/git-lfs/blob/main/INSTALLING.md
ubuntu 系统: apt/deb repos: curl -s https://packagecloud.io/install/repositories/github/git-lfs/script.deb.sh | sudo bash
Centos/Redhat系统: yum/rpm repos: curl -s https://packagecloud.io/install/repositories/github/git-lfs/script.rpm.sh | sudo bash
然后
1. sudo apt install git-lfs
1. git lfs install
2. git clone https://huggingface.co/moka-ai/m3e-base

3. git lfs 下载模型文件,会提示连接不上。多试几次,国内电信网络一旦能连上,下载速度还是很快的。
6.下载chatglm2-6B模型文件
chatglm2-6b模型文件地址:
https://huggingface.co/THUDM/chatglm2-6bchatglm2-6b-int4模型文件地址:
https://huggingface.co/THUDM/chatglm-6b-int4
1. git lfs install
2. git clone https://huggingface.co/THUDM/chatglm2-6b
3. git clone https://huggingface.co/THUDM/chatglm2-6b-int4
4. # git lfs 下载模型文件,会提示连接不上。多试几次,国内电信网络一旦能连上,下载速度还是很快的。
7.修改embedding模型配置和大语言模型配置:
1. cd langchain-ChatGLM/configs
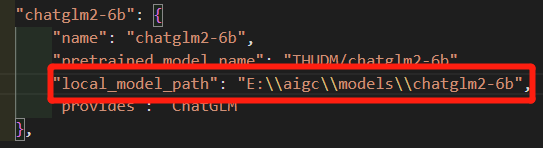
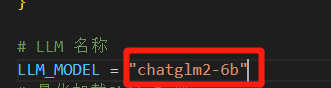
2. vim model_config.py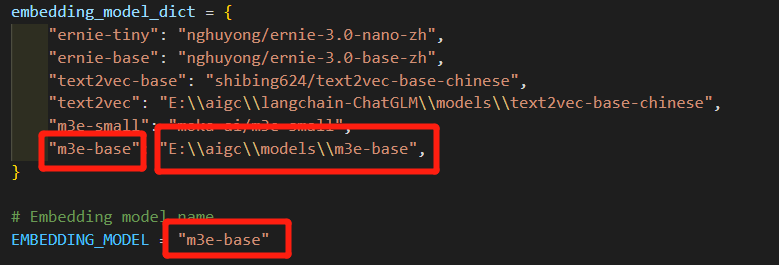
修改chatglm2-6b下的pretrained_model_name为本地chatglm2模型文件地址。
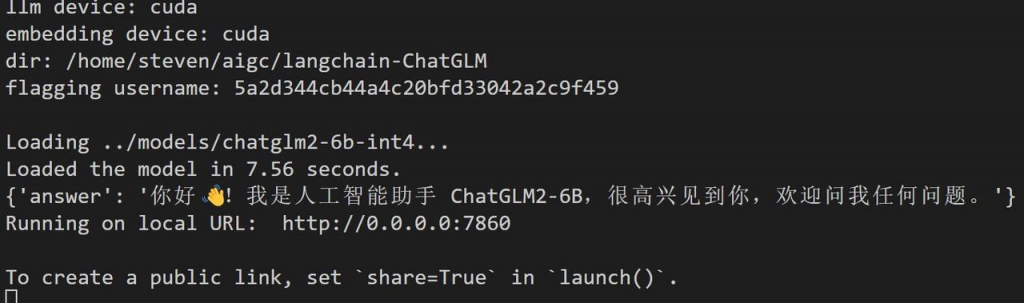
8.启动
./env/bin/python ./webui.py启动成功
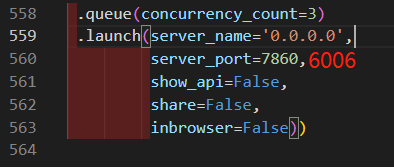
- 如果是autodl上部署:
记得在webui.py中把端口号由默认的7860改为6006,如下图:
screen -U -S AI
screen -wipe